|
|
|
Before every major assessment I like to facilitate review activities in class. That being said, I can only handle the Kahoot theme song so much, play so many games of "Chemistry Jeopardy", or figure out another variation of Periodic Table Battleship to satisfy review of the whatever skills we are learning that topic. Not that there is anything wrong with the above games, or the myriad of variations. Indeed, if I played Kahoot everyday my students would be STOKED! However, the above review games, in my mind, always fall short in one area: student creation/invention. This is where Google Forms is a powerful tool! During the past unit on Formula Analysis, distributed a different problem to each team of students. I then asked each of students to input their solution AND a Youtube video of them solving their problem on a whiteboard into a Google Form. I then made the output spreadsheet public, and students spent time solving one another's problems, and watching one another's solutions when they were stuck. Although not as superficially engaging as Kahoot, watching students invent videos to explain their problems, and negotiate not only the problem, but also how to teach it, was incredibly inspiring, and IMO, much more engaging from an outside perspective. Although this post is represents an extremely simple application of Google Forms, one I'm sure many of you have already done before or experimented with in the past, the power of immediately sharing the output formula with students, containing live links to the videos THEY created, was worth sharing. Click here for the Google Form and here for the output spreadsheet. See screenshots below as well. 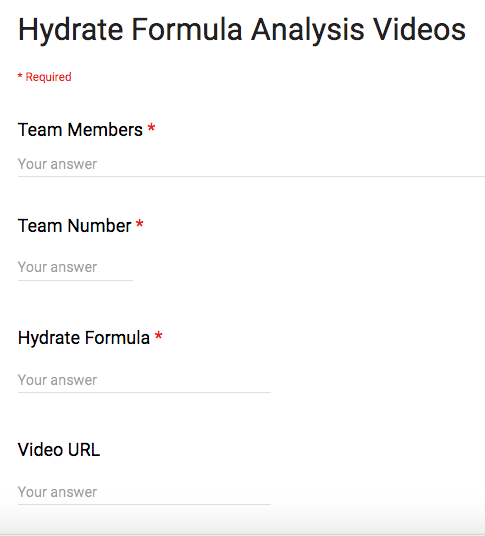 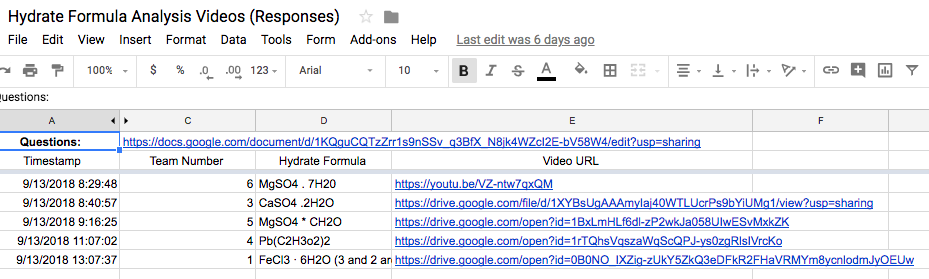
As a science teacher I struggle with the tension between being "innovative" and the benefits of practical, simple, efficient system. This dichotomy is amplified when, for me, choosing between more advanced sensors (temperature, conductivity, etc.) such as those provided companies like Vernier and Pasco.
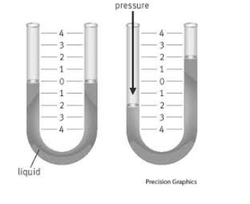
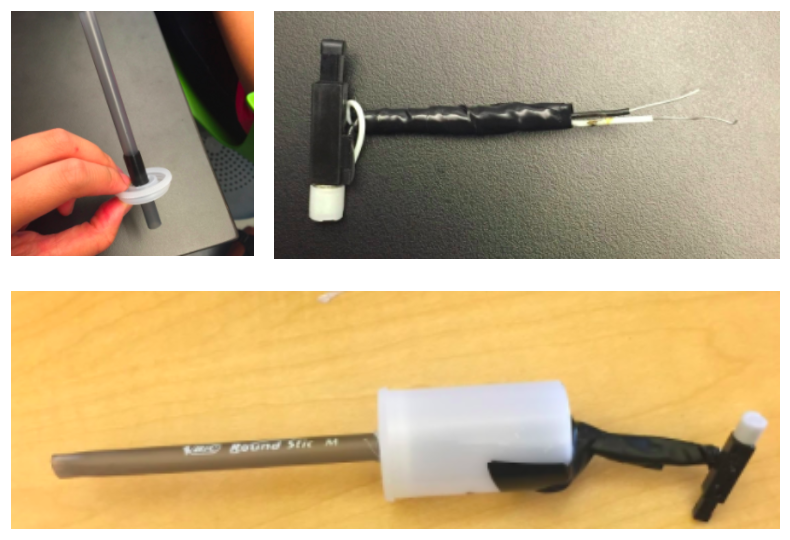
Anecdotally have found that, rather than leveraging the types of interfaces described above, when I have students design and built their own interfaces they learn more about not only the data they are measuring, but in building the equipment, they develop an appreciate and knowledge of the intricacies involved in capturing the data. This became clear to me when I had students create their ownTitration Drop Counter last school year. Albeit not as specific nor aesthetic, the mere act of going this process, I argue, is more meaningful for high school students where the risks associated with inaccurate data collection is low, but the risks of information gaps or underdeveloped conceptual understanding of content, is high. To this end, I have chosen one piece of equipment for each of the 6 units in my 10th grade chemistry class, for students to build and leverage in their laboratory investigations. Below is a list of each piece of equipment, and an associated link that students will use for construction information and hints. 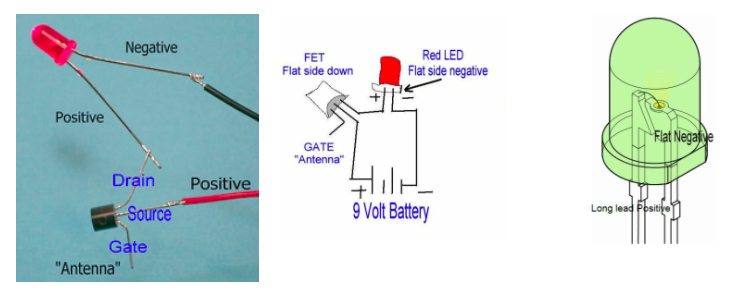
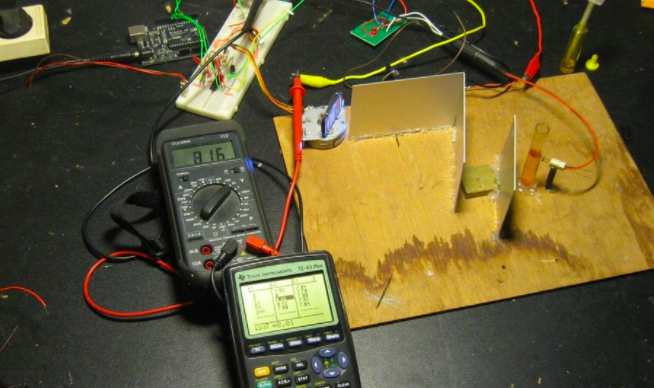
It's absolutely no secret that I'm a huge fan of leveraging the MakeyMakey circuit (http://makeymakey.com/) as an instructional device. While there is an obvious connection with such things ha as inventions during a youth science camp, or more creative solutions such as challenging high school chemistry students to create titration "drop counters", the ease of entry and almost limitless potential of this device is incredible.
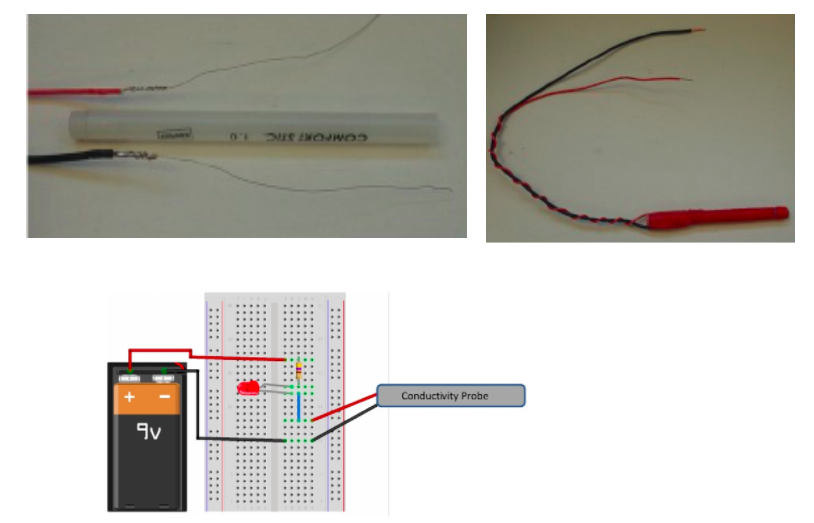
That being said, the simplicity coupled with power of the MakeyMakey can at times make it seem often, especially for younger learners, as a toy rather than what it is: a modified Arduino Leonardo microprocessor. Keeping this in mind, I have been on a journey over the past two weeks to try and leverage the Arduino Leonardo as a MakeyMakey to create a much better flow in my high school robotics class between programming with the Arduino UNO, and transitioning into using the MakeyMakey as a remote control device. For example, beginning the year with the Arduino UNO grounds students really well in basic line coding and also input-output microprocessing. From there we transition into using the mBOT, given it's integration with the Arduino language. The integration with the Arduino IDE provides a fabulous flow for high school robotics students. Moreover, with the introduction of the 2.4 GHZ wireless connection between the mBOT and a computer (does not work well with chromebooks) students can easily use Arduino to create their own computer based remote control for the robot. An obvious connection at this point would be to then leverage the MakeyMakey to create their own remote control repurposed from every day objects such as aluminum foil and Play-Doh. In past years this is been very successful and I say things like "all your long we've been using the Arduino and now you're using a modified Arduino to control an Arduino robot!" Students love this but because the MakeyMakey is so simple to use it's hard for students to make a connection between a raw Arduino interface and the modified appearance of the very aesthetic and simple MakeyMakey. Back to my point. I am happy to say that I have successfully been able to re-create a MakeyMakey from an Arduino Leonardo and I am very excited to use this in the last phase of robotics class this fall! I am hopeful that the raw look of the Arduino Leonardo with the exact same functionality of a MakeyMakey will create a sense of connectedness in the course for students beginning with simple Arduino UNO programming, ending with leveraging the Arduino Leonardo to create a MakeyMakey mBOT controller. At the conclusion of the year I will show them then the modified Arduino Leonardo "MakeyMakey" as a way of emphasizing invention and accessibility for all. Below is the instructional video I used as a guide in the creation of the Arduino Leonardo based MakeyMakey Feel free to reach out if you have any questions and expect future blog post on the efficacy of this integration. Like many teachers, I have always struggled with making assessment meaningful for students. After reading Show Your Work by Austin Kleon I moved from student Google Doc lab reports in chemistry class to blog posts. My goal was for student to build a public archive of curated work that students can feel proud of. For the past few years student blogging has been a success. Click here for an archive of this year's chemistry blogs.
Keeping the above in mind, this is my first year teaching a robotics class in the curriculum and I wanted to institute the same blogging strategy. Unlike chemistry, my robotics class didn't show as much enthusiasm about the blogging process. When I asked one student why his answer was fascinating: "The stuff we make in Robotics class doesn't feel like school. It feels real. Blogging feels like school. They don't really match." Over the past two years, many of these student's teachers have embraced blogging, and while I firmly believe it to be a powerful, public and authentic medium for sharing work, it was clear from the above response, and others I have gathered, that the students yearned for a more authentic, less contrived vehicle to break down the barrier between the "real-world" and school environments. Our answer: Instructables! Whenever I have to learn how to create anything I, and my students, use Instructables. It's just what we do. Because Instructables represents a place where "real" people, go to create "real" things, and is run by a "real" company (Autodesk), whose software we use to create "real" prototypes, it felt like a perfect place to help students, in a Robotics class where building authentic "real" prototypes is core to the class ethos, engage in a type of "real" world product showcasing. Once the decision was made (two weeks ago), I jumped in headfirst, and invited students to use Instructables to post not only share their most recent inventions, but outline their design process. The student's products exceeded my expectations and reminded the power of not only a public product, but also how the power of outlining and unpacking the invention process into steps for others to follow. Instructables provides a fabulous medium where this process happens, not via a teacher created rubric, but via observing the thousands of examples that already exist on their website! Below are three student created examples from my Robotics class at Sonoma Academy.
|
Ramsey Musallam is a full-time science teacher in Santa Rosa California.
Categories
All
Archives
February 2024
|
 RSS Feed