|
|
|
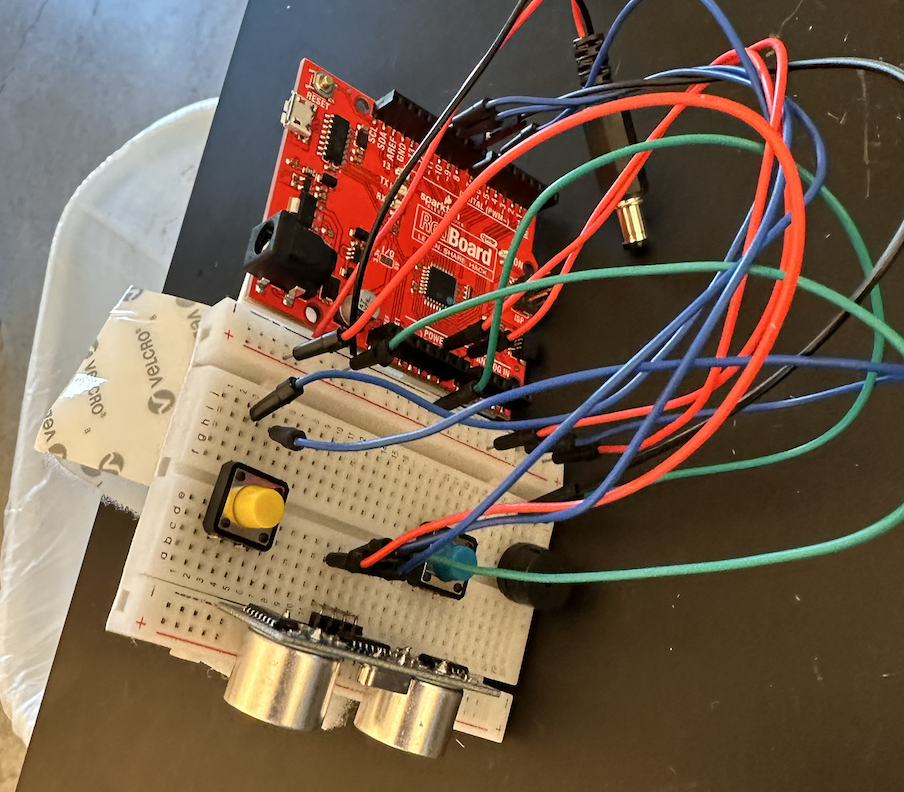
This lab activity takes students on a unique journey through the world of neuroscience and engineering to explore the complex nature of Parkinson's Disease. Students will simulate the motor symptoms of Parkinson's Disease firsthand by experiencing disruptions in motor control aimed to foster empathy for those living with the condition. Integrating biochemistry, neuroscience, and engineering principles, this lesson is a powerful tool for inspiring the next generation of scientists and empathetic individuals. Click here for access to all lesson resources. 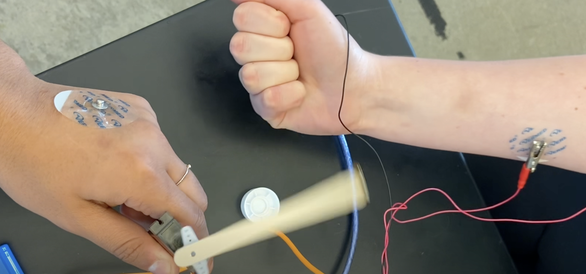 This lab activity directly tackles a pressing issue: the opioid crisis, with a spotlight on fentanyl, one of the most potent and problematic drugs out there. This isn't just any experiment; it's a timely exploration of a topic that's as relevant as it is serious, using a creative setup to model the brain's defense mechanisms against substances like fentanyl. Using simple materials to simulate the blood-brain barrier, we'll uncover why fentanyl is particularly adept at breaching this protective boundary. It's a hands-on way to grasp the complex science behind drug interactions and their impact on the brain. I'm aiming to strike a balance here—keeping it professional, yet approachable, ensuring we all grasp the gravity of the opioid epidemic while engaging with the chemistry that underlies it. This lab is more than an educational exercise; it's a chance to connect classroom learning with real-world challenges and tackle this topic head-on, learn together, and shed light on the science behind opioid toxicity. Click here for access to all lesson resources 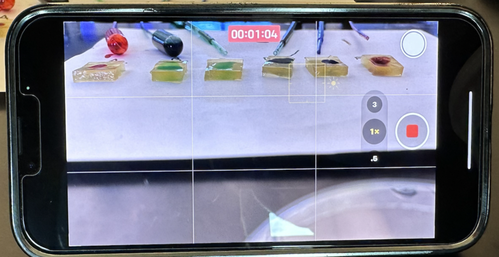 SummaryMy high school students are creating assistive devices for visually impaired individuals using the Arduino Uno platform. This project focuses on developing innovative digital mobility aids, utilizing ultrasonic sensors and small servo motors. These aids are designed to enhance spatial awareness for visually impaired users through sound and tactile feedback, alerting them to nearby objects. I am hopeful that this initiative provides practical, real-world applications of technology but also attempts instills a deep sense of empathy and innovation in my students. Procedure
In our Design for Social Good class, students were given a final project challenge: to apply their CAD, electronics, and Robotics skills to simulate robotics' applications in military and law enforcement. Our specific task was to create a user-friendly CAD-designed controller housing an Arduino Leonardo. This controller could remotely operate a robot, simulating the disarmament of a hypothetical explosive. Students controlled their robots from a different location by using their phones as cameras, which were mounted on the robots. They streamed video to their control station through platforms like Zoom or FaceTime. To understand the project instructions and grading criteria, click here. For documentation, students recorded their streamed video and added voice-over narration to explain the process. Below is an example:
This will be my third year teaching an elective course called "Design for Social Good". This summer I assigned myself the task of creating the entire curriculum in the form of a student digital workbook. The curriculum uses Fusion360 as an anchor, integrating CAD into various projects centered around Assistive Technology, Medicine, and Robotics. Additionally, I tired to integrate AI into the curriculum in meaningful ways, asking students to generate YouTube shorts using ChatGPT and Pictory I am hopeful that this curriculum provides a unified and organized space for students to engage in the curriculum. Because students will be copying and sharing their own workbooks, I am slightly nervous about how to push out to students the inevitable tweaks to the curriculum I will make throughout the year. Live and learn I suppose! Click here to access the curriculum. Note: Links to Fusion360 homework assignments can be found in the heading of each page.
|
Ramsey Musallam is a full-time science teacher in Santa Rosa California.
Categories
All
Archives
February 2024
|


 RSS Feed