Building the T4SG Class Hub
Back in 2017 I wrote about my first assistive technology course, a two-week Intersession built on MakeyMakeys and Arduinos. The idea that stuck with me from that class was simple: when you hand a teenager a soldering iron and a real person to design for, the work stops being about the grade.
Nine years later, that idea is a full course. Tech for Social Good (formerly Design for Social Good) is a semester of adaptive switches, sensors, and controllers built for specific people with specific goals. And now the whole class lives in one place: a hub I built myself at t4sg-at-sa.vercel.app.
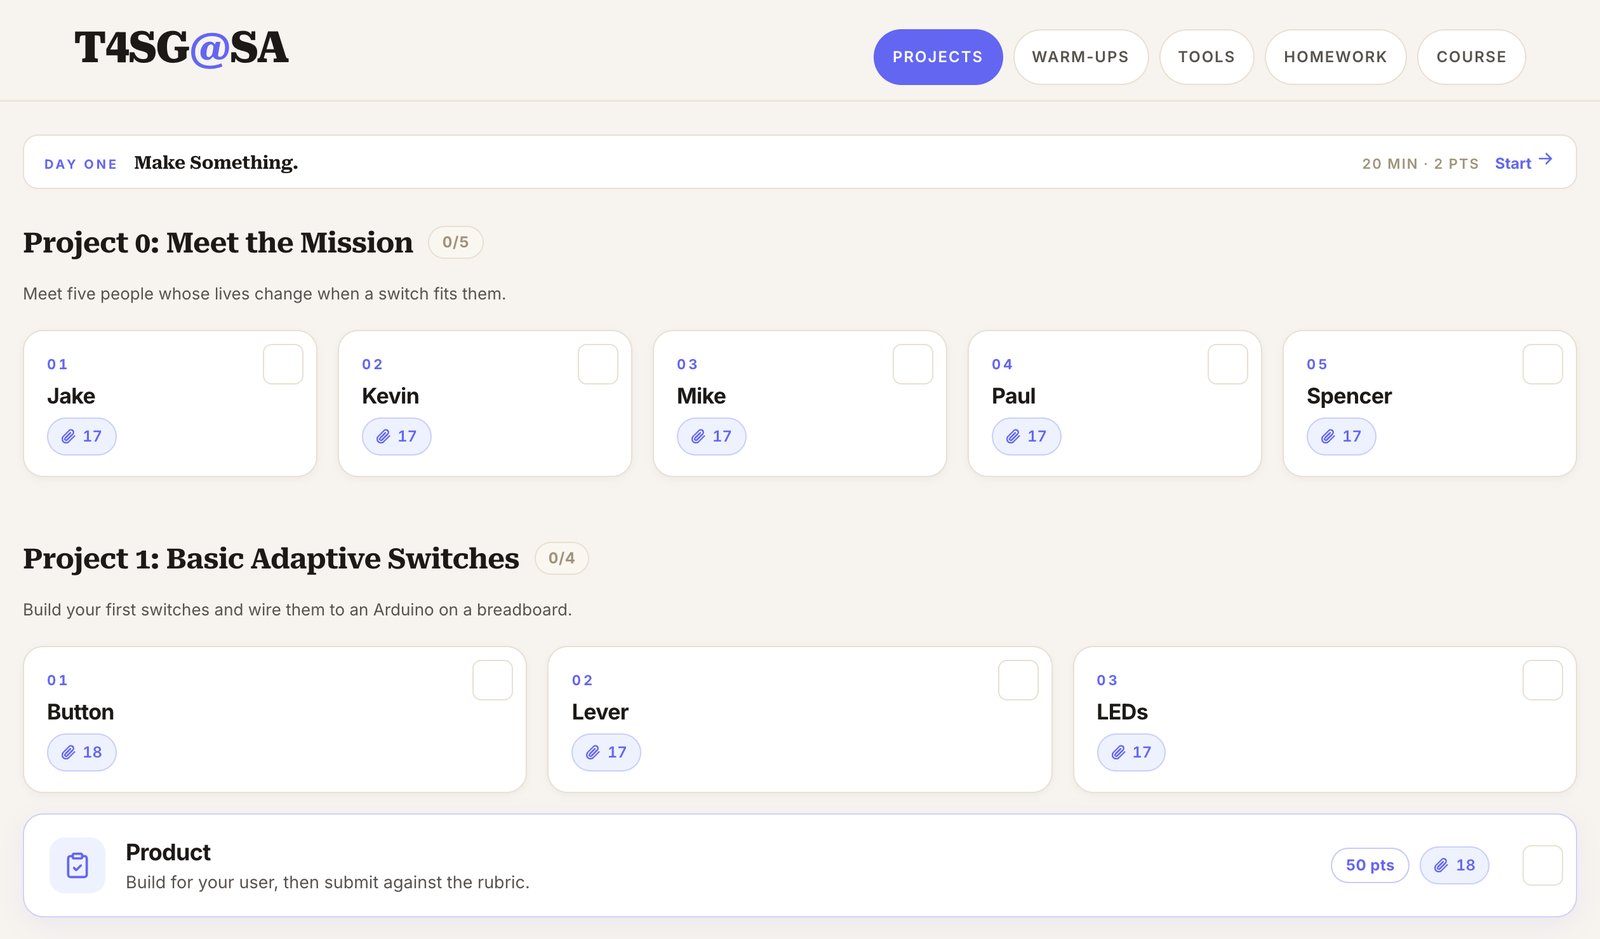 The Projects page. Every benchmark is a card, and every card shows how many students have dropped work into it.
What kept bugging me
For years this class ran on a patchwork. Instructions in a Google Doc, code in the Arduino IDE, wiring diagrams in Tinkercad Circuits, CAD in a different tab, photos in a camera roll, videos in a Drive folder. Students did beautiful work, and then it scattered. When it came time to grade a final product, I was chasing six files across five platforms per kid, and the kids were spending more energy on logistics than on the person they were designing for.
The other thing that bugged me was the arc. Each project felt like its own island. Students would build a lever switch, take it apart, and start over with a sensor. Nothing accumulated, so nothing compounded.
So I did what I wrote about in Build the Tool, Don't Find the Tool. I stopped looking for a platform and built one.
One connected project, not four islands
The hub organizes the semester into five projects: Project 0: Meet the Mission, Project 1: Basic Adaptive Switches, Project 2: No-Force Sensors, Project 3: Hands-Free Controls, and Project 4: Adaptive Controller Hub. Project 0 opens the mission through five short stories. Projects 1 through 4 are each a chain of two-point benchmarks (Button, Lever, LED, and so on) that ends in a 50-point Product.
The rule that holds it all together: nothing gets unplugged. Your Project 1 final product is where Project 2 starts. Your Project 2 final product, with Project 1 still inside it, is where Project 3 starts. By the time students reach the hub in Project 4, they are carrying one board with every input they have ever built still wired in and still working. The arc is literally on their breadboard.
The person comes first
Every Product opens with a brief, not a rubric. A short story, then a How might we question, then the constraints.
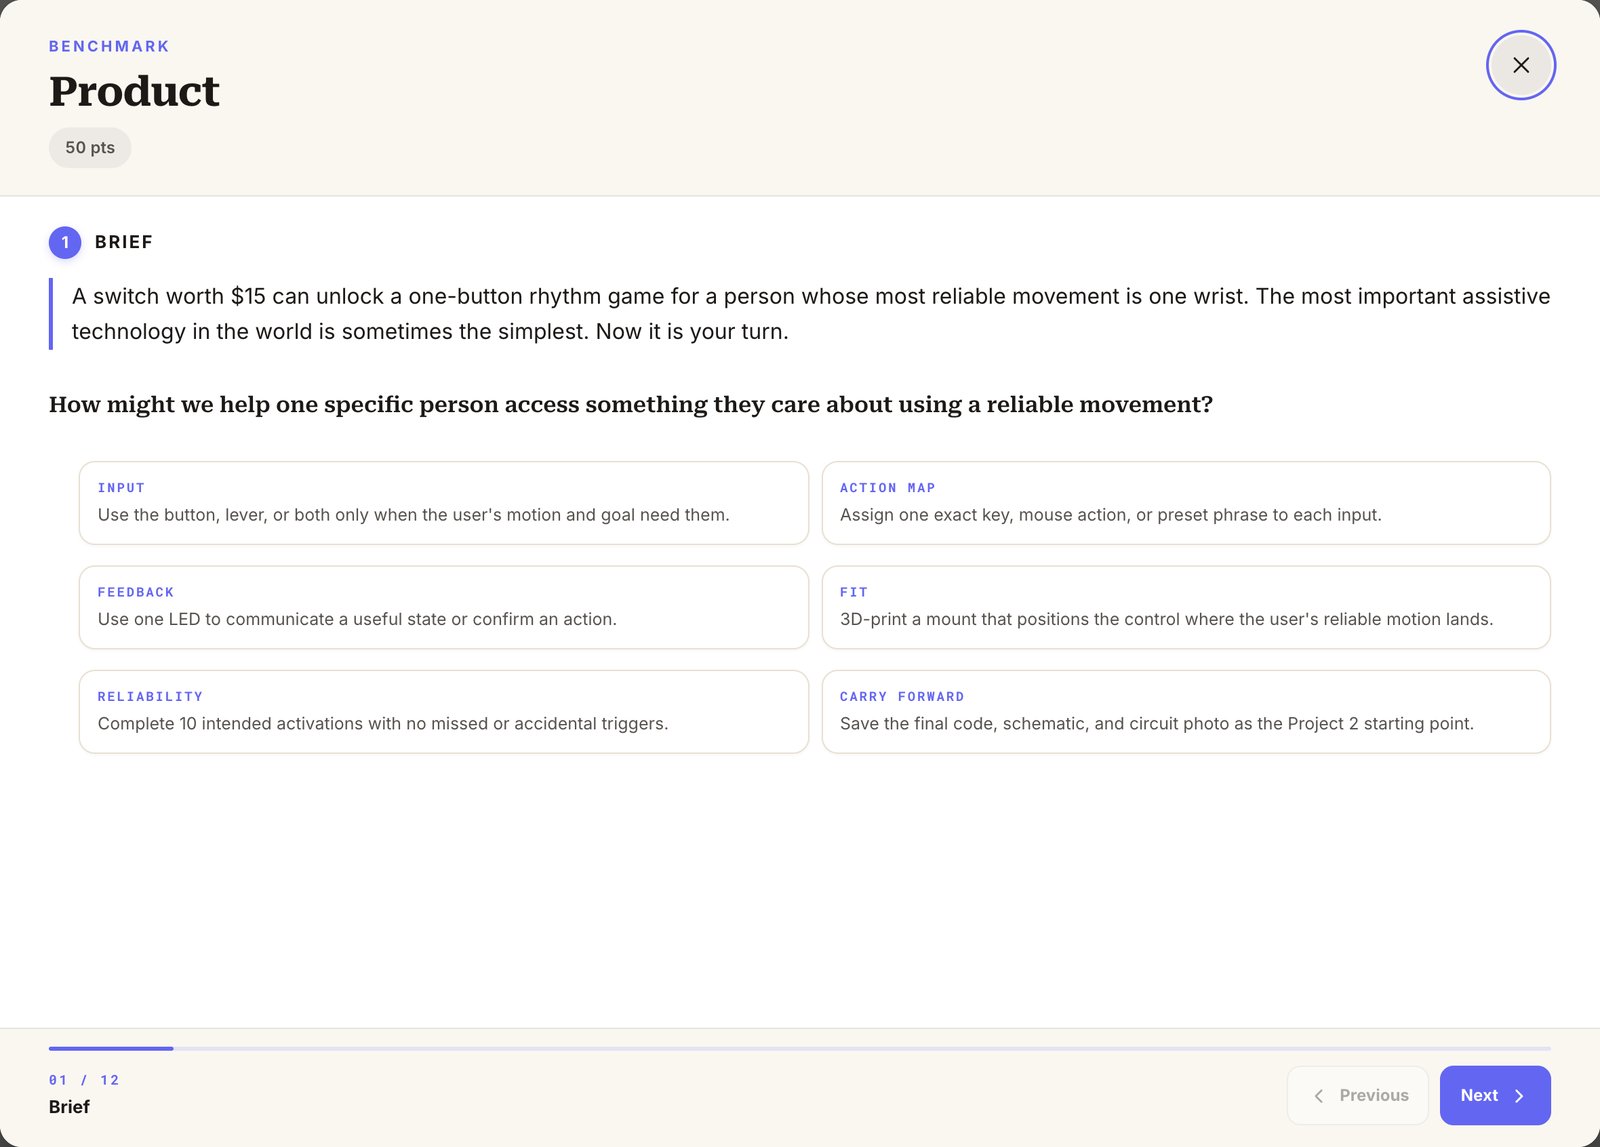 The Project 1 Product brief. The person is the first thing students see.
Then students choose who they are designing for. Each card leads with what the person wants to do and what their body CAN do reliably. The diagnosis sits at the bottom, in small type, as context, not as an identity.
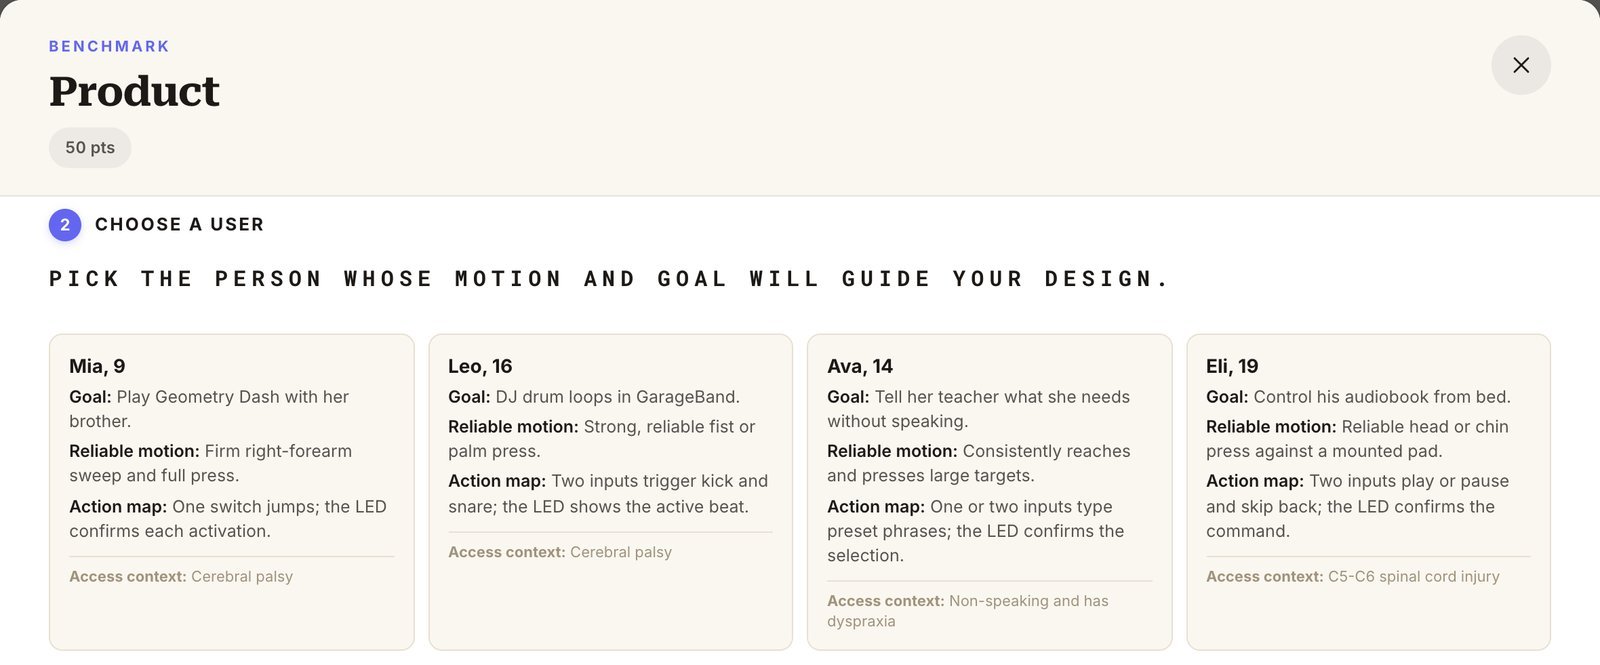 Four people, four very different motions, so designs diverge across the class.
Where the AI actually lives
Here is the part I have been thinking about the most.
The hub is a very human thing. It exists so that a teenager can build a switch that lets someone play Geometry Dash with her brother. But I built every line of it by vibe coding: describing what I wanted to an AI coding agent, testing it in my classroom, and going back with what broke. The Arduino Code Loading Tool, Wiring Schematic, Idea Board, Image Capture, Rubric & Drop, Exhibit, and daily warm-ups. None of it would exist if I had to write it by hand, and none of it would exist if I hadn't spent years in this room learning what these kids actually need.
For students, the AI sits in one very specific spot: writing Arduino code. Each benchmark gives them a short, precise prompt to paste into Gemini or ChatGPT, along with a starter prompt that tells the AI exactly which board and parts they have and to keep the code as simple as possible.
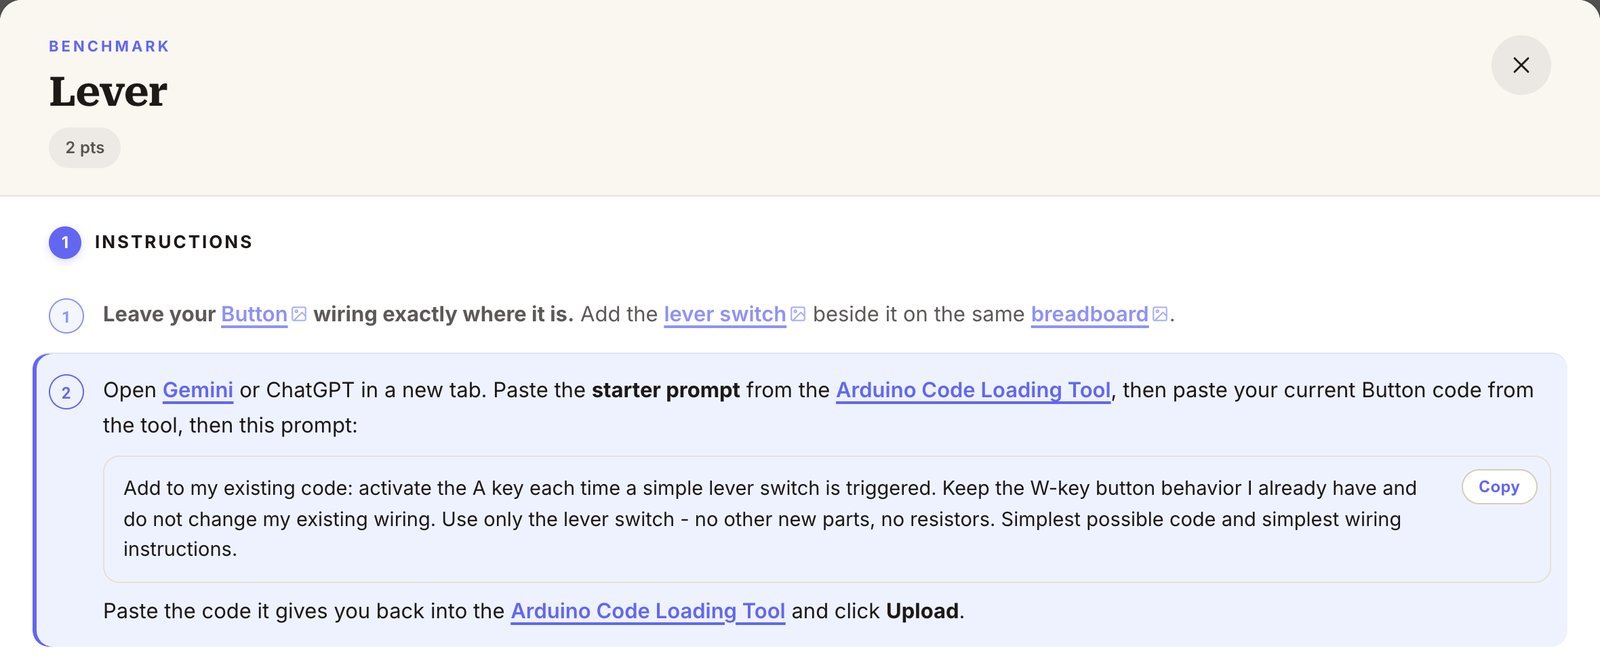 Every prompt has guardrails: keep what you already have, add only the new part, simplest possible code.
Then they paste the code into the hub and upload it straight to their Arduino from the browser.
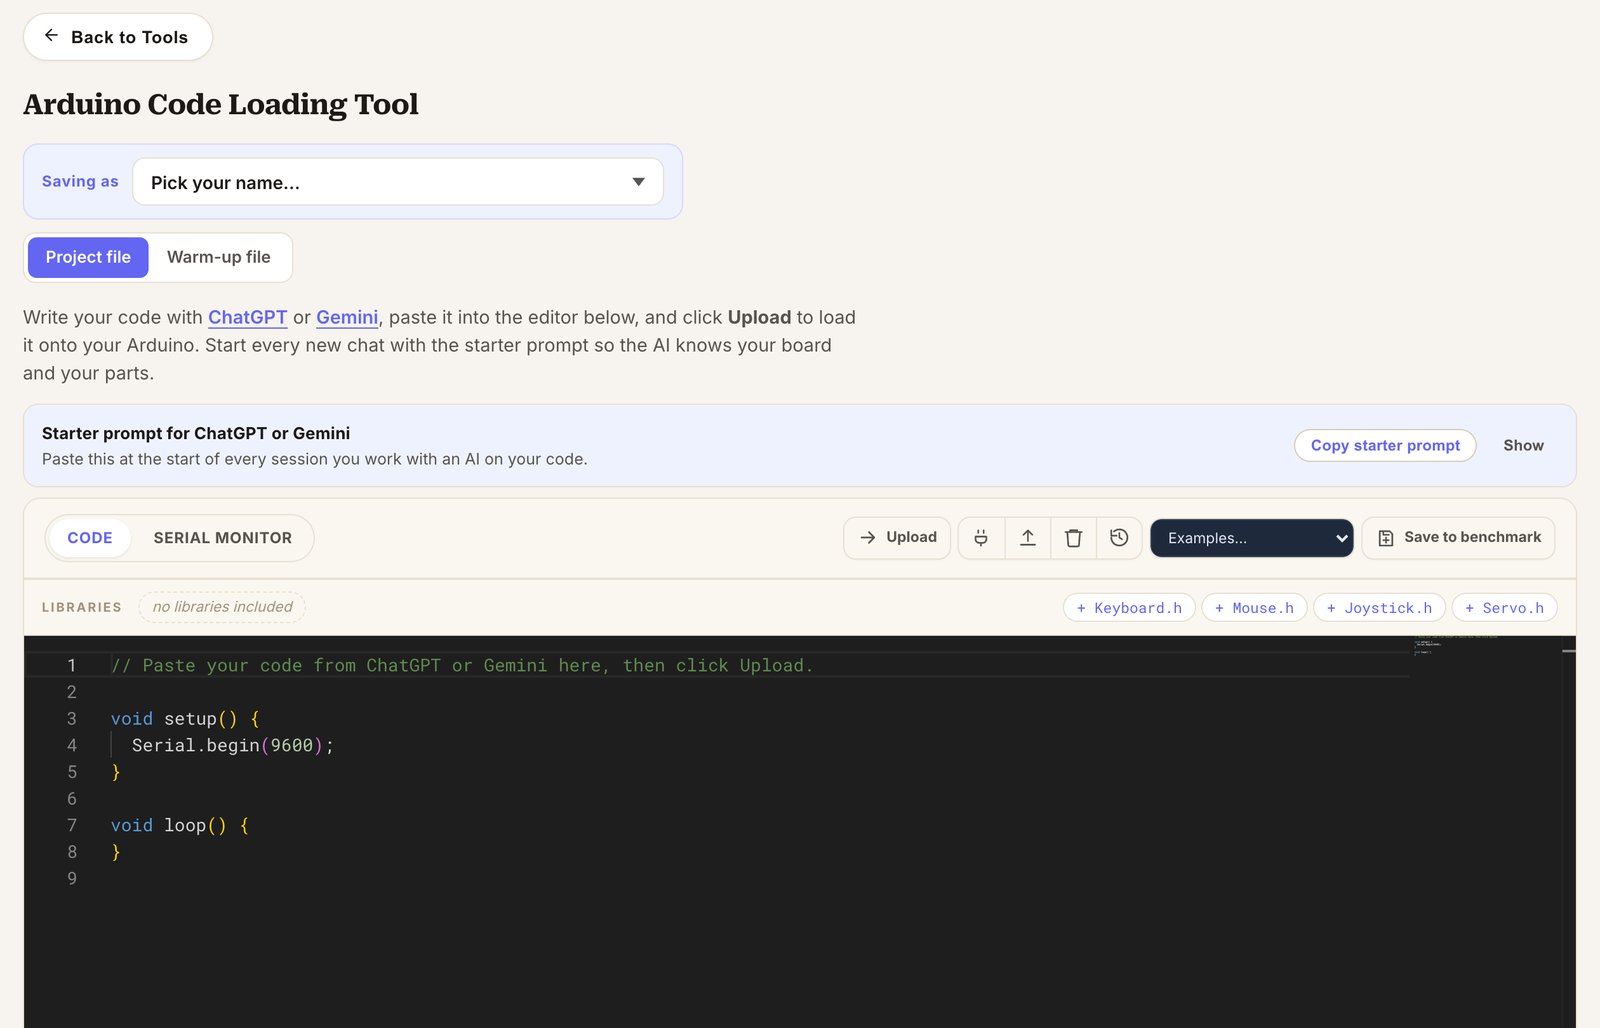 The Arduino Code Loading Tool. Write the code with an AI, paste it here, click Upload.
I want to be honest about how I got here. My first version had an AI chat built right into the hub. It seemed like the obvious move. It wasn't. One student wrote in their Project 1 reflection that the built-in tool "kept making weird code," so they took it to Gemini, got it fixed, and brought it back. By the end, they wrote that the project taught them a lot about how AI coding agents differ. On September 26 I pulled the built-in AI out entirely. Students now prompt the tools the rest of the world uses, and the hub stays focused on what only it can do.
That is the nuance I keep landing on. AI is incredible at the parts of this work that are pure syntax. It has no idea what it feels like to press a button with your forearm. The sketch, the user, the mount, the testing, the redesign: that is all human, and the hub is built to protect that time, not to automate it.
The artifacts are theirs
Every Product asks for the same seven pieces: a sketch made before building, the CAD file, the code, a wiring schematic, a photo, a video of the device in use, and a written reflection. The tools inside the hub (Idea Board, Wiring Schematic, Arduino Code Loading Tool, and Image Capture) each have a Save to benchmark button, so the work lands in the right slot without a single download.
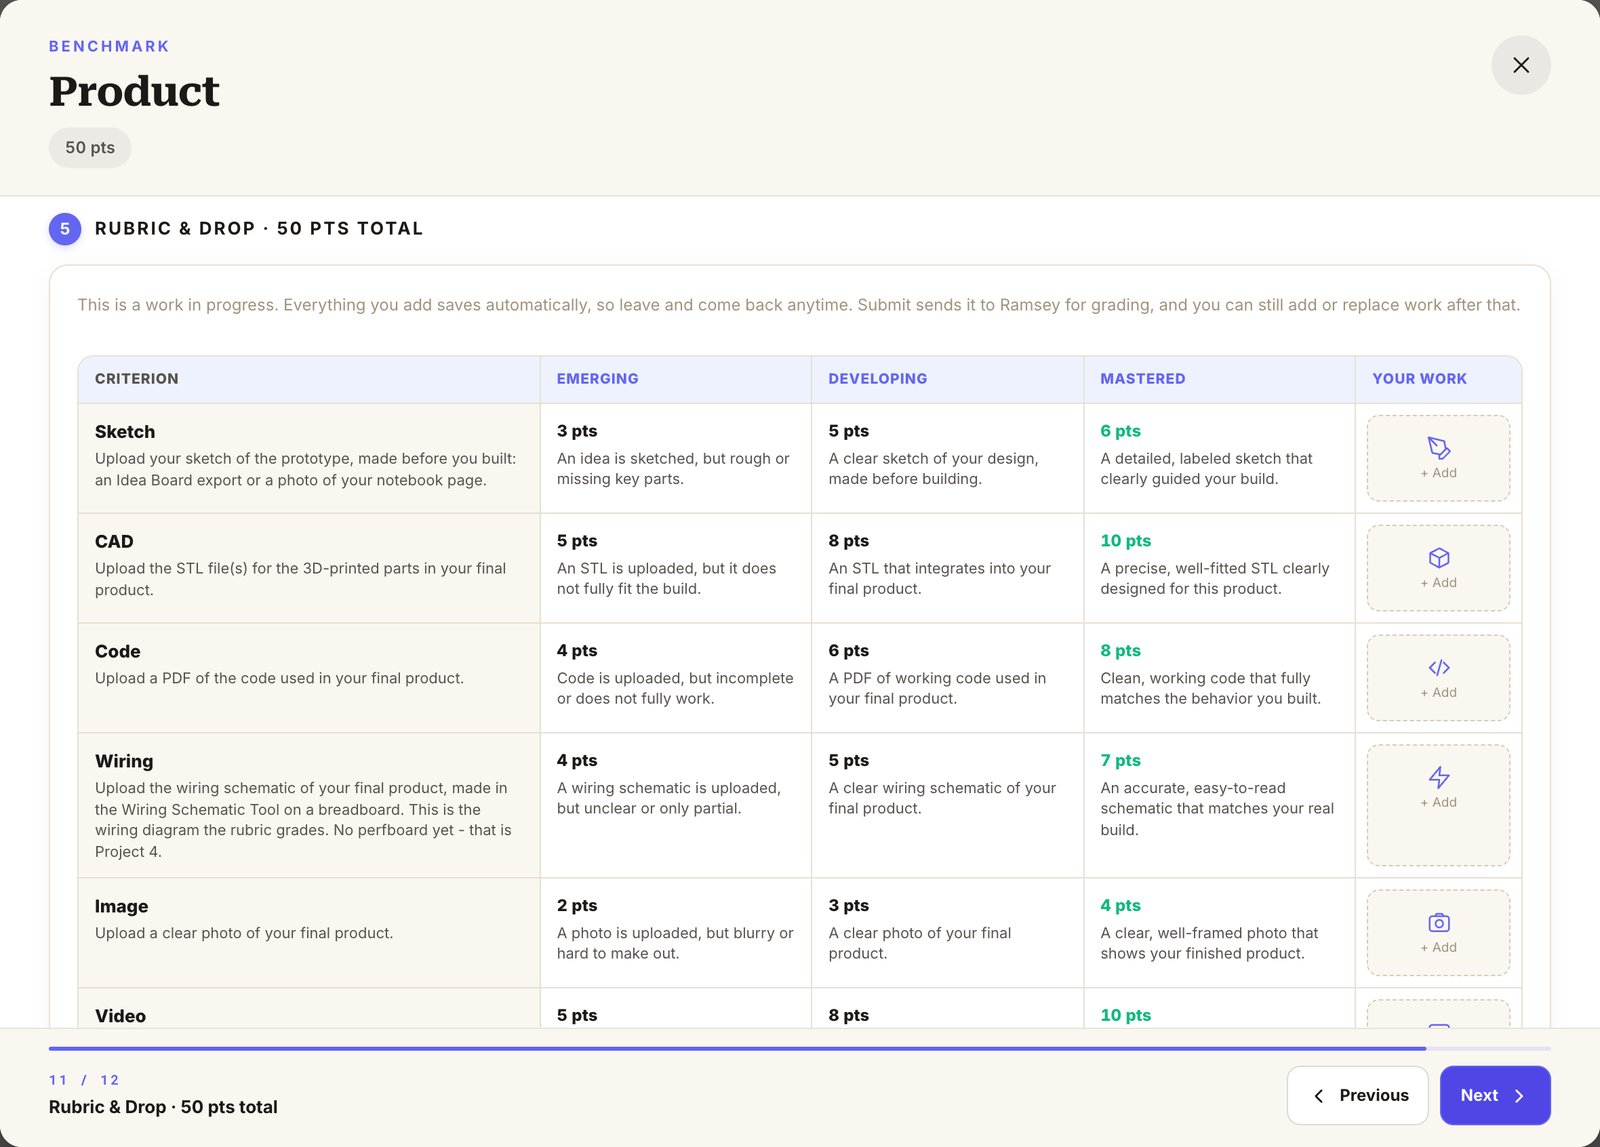 The rubric IS the checklist. Each row is a slot students drop into.
Here is what that looks like in one Project 1 submission, start to finish. The design gives the user a way to tell a teacher "I need a break" without speaking, plus a second button for "I'm ready to continue."

Sketch, schematic, build. One student's Project 1 Product.
Their reflection made me smile. After really struggling with the code on the Lever and LED benchmarks, this time "the code was perfect on the first try." The hard part was soldering. That is exactly the kind of struggle I want them to have.
Eighteen students turned in a Project 1 Product, and no two look alike.
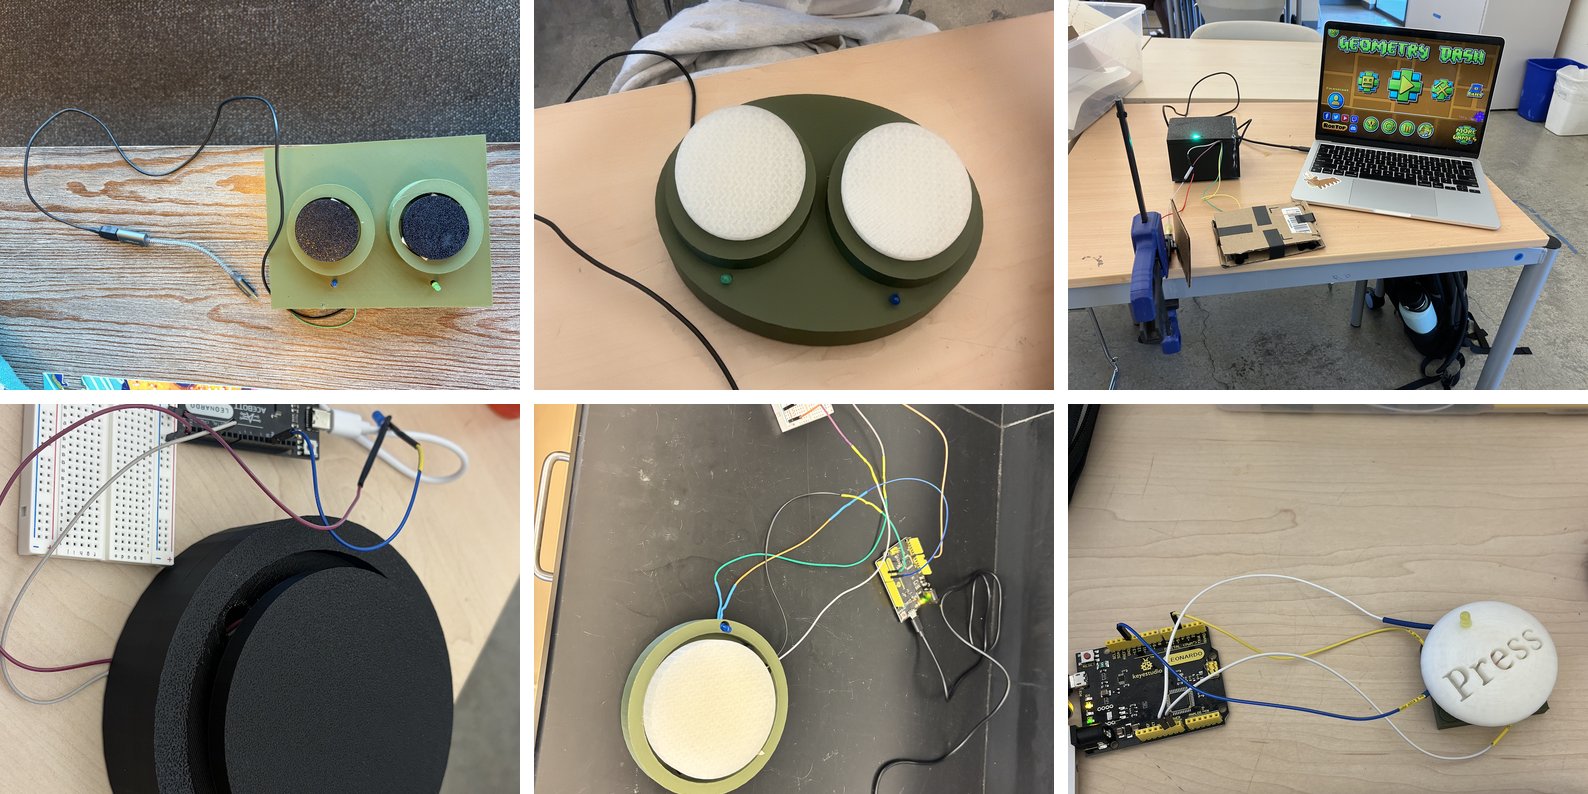 Same parts bin, same rubric, six very different answers to "who is this for?"
Where it goes from here
The best work ends up in the Exhibit, a quiet wall of past student builds, Instructables, and websites that new students can browse.
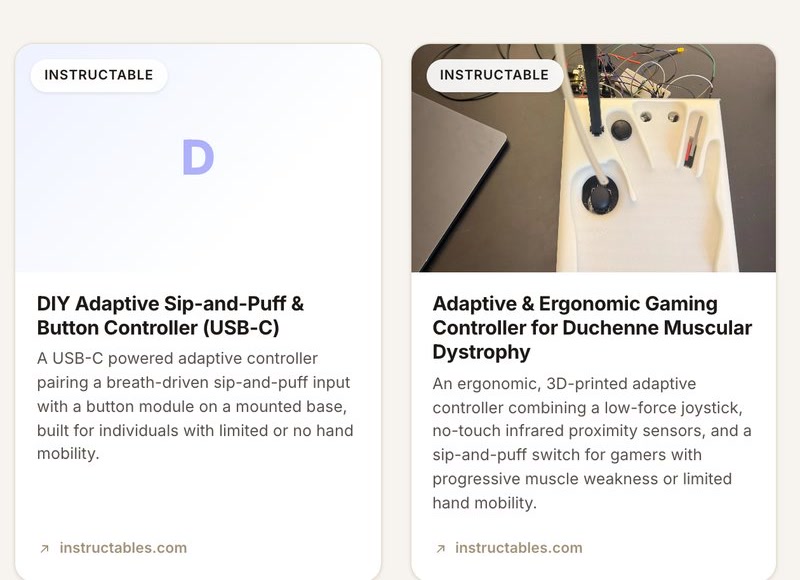 A corner of the Exhibit. Past work becomes the hook for the next class.
I honestly don't know yet what this class looks like when it reaches Project 4 and every student is soldering their cumulative board into a single hub. I am sure something will break, and I'll vibe code a fix that night. What I do know is that, for the first time, the tool fits the class instead of the other way around. The AI wrote a lot of code this year. The students made all of the things that matter.
Keep reading
New writing, when there is something worth sharing.
Notes on curiosity, inquiry, science teaching, and building the lesson.
No spam. Unsubscribe anytime. Prefer RSS?
Related reading
Pseudoservice and the Shift Toward Real Impact
For years, my Design for Social Good class has focused on building assistive technology devices, specifically computer switches for people with disabilities such as quadriplegia, cerebral palsy, and..
Read →Empowering the Visually Impaired: Innovations with Arduino Uno in Assistive Technology
My high school students are creating assistive devices for visually impaired individuals using the Arduino Uno platform. This project focuses on developing innovative digital mobility aids, utilizing.
Read →Simulating Parkinson's: Using Electronics to Build Empathy
This lab activity takes students on a unique journey through the world of neuroscience and engineering to explore the complex nature of Parkinson's Disease. Students will simulate the motor...
Read →