|
|
|
I have written in the past about the Assistive Technology projects my engineering students have created usingthe MakeyMakey as the primary electronics interface and Instructables as the medium for public display. I am proud to share that the team at MakeyMakey has shared the work of my students via a featured blog post. Click here to read.
Over the past two weeks I had the opportunity to develop and teach an elective class to expose students with no prior knowledge in Robotics to basic engineering and program via the Intersession program at my school. The program went well and the students seemed to benefit from a simplified/clear structure that leveraged autonomous robotics (via Lego EV3) and RC Robotics (via VEX V5) as the overarching pedagogical structure. Click here to access the curriculum for those of you who are also interested in introducing students to basic robotics at your school site or in your programs.
In my Engineering for Social Good elective I instituted "Lab Practicals" rather than formal exams and quizzes. Mastering Computer Assisted Design (CAD), via Fusion360, has been a constant thread throughout the class. CAD mastery was facilitated through weekly challenges organized in a Padlet "Shelf" where students would respond to a video tutorial by repeating it then making four alterations of their own. Students would then upload their product and explain their modifications in the shelf for all to see. Click here to see student work in padlet. This process facilitated mechanical/algorithmic knowledge of Fusion360, while integration of CAD into our projects and practicals promoted application of CAD.
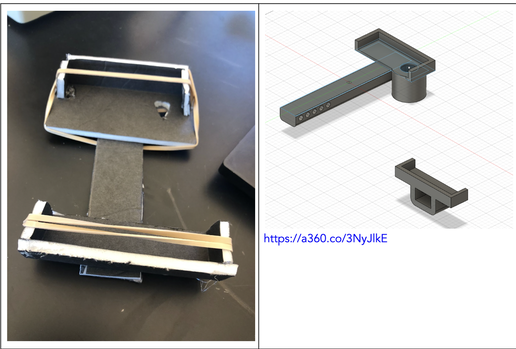
Keeping the above in mind, for the Lab Practical of the semester I wanted to students to embrace the mission of service central to the engineering elective class while also applying their CAD content. Serendipitously, my freshman Biology class was in the middle of an activity where they were investigating fed blood cells under a Compound Light Microscope. Students were asked to use their phones to capture images of normal and sickled red blood cells. While many students were able to do this, pictures were shaky and the process of balancing the phone limited their ability to zoom in on the red blood cells and take quality images. I know devices exist to balance phones over microscopes for this exact purpose, but then the idea hit me: Why don't I have my engineering students partner with my Biology students and leverage Design Thinking? So that is what we did! and it worked out great! Click here to see the template used to organize and assess student work and here to see an exampled of a completed student project. See image below for the prototype that ended up being the most transferrable to all student devices and microscopes. I have written previously about Assistive Technology projects I have implemented as part of my engineering elective courses. I revamped this project in my Engineering for Social Good class last semester, organizing the pedagogy around a structured Design Thinking Cycle, with Spastic Cerebral Palsy patients as the defined end user and Instructables as the primary public display medium. Click here and here to view two different final student Instructables.
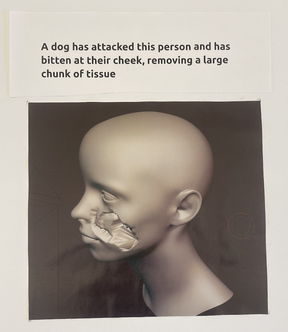
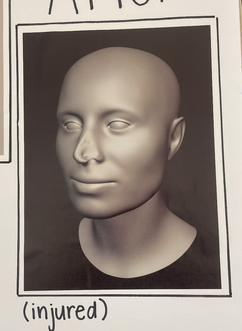
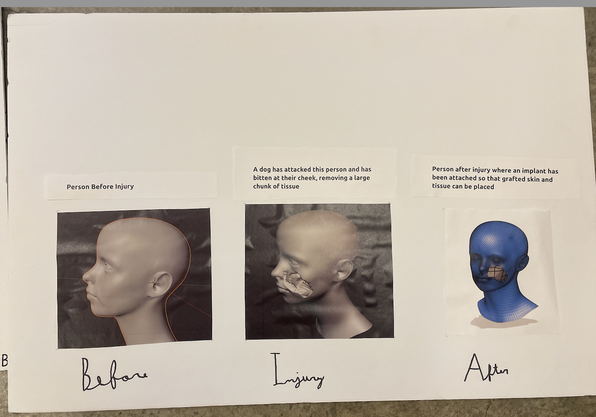
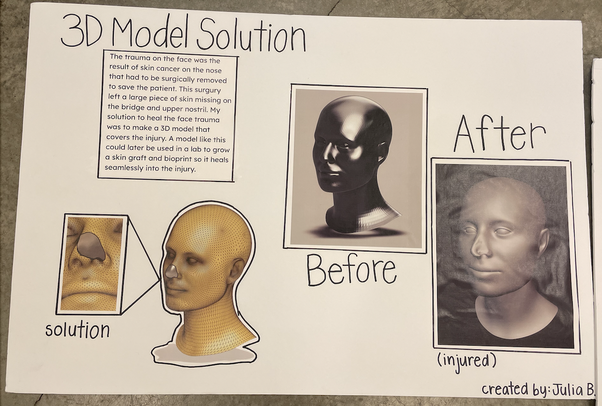
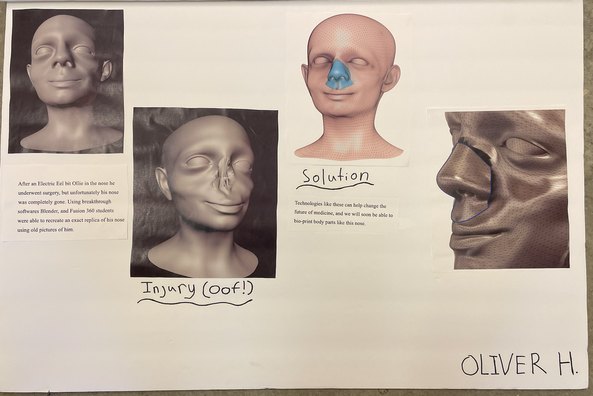
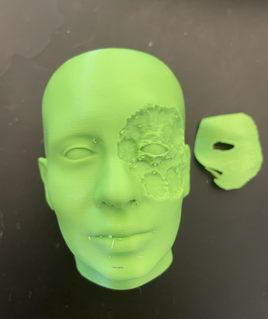
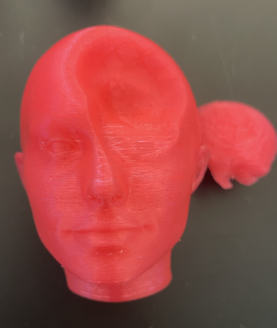
Last month a parent of one of my engineering students came to speak about his time spent as an Ear, Nose, and Throat (ENT) surgeon, working primarily with bear mauling victims in Alaska. As part of his presentation, the speaker discussed how his team would use 3D model reconstructions from images of the patients prior to the attack to fabricate custom braces to support broken facial bones and tissue in a customized fashion. Click here to read an interesting article on the current state of this intervention. 3D modeling has been a huge theme in our class this year (click here for CAD assignments and student artifacts) and keeping this in mind, students were immediately drawn to the use of Computer Aided Design (CAD) in solving such meaningful problems. Inspired by the presentation, I decided to scrap our current unit and attempt to design a way for our students to simulate the process described by our speaker. With a little research, and some late nights tinkering with Fusion360 and Blender, I put together a lesson that went really well. The instructional design process I created, along with links and examples, is outlined below. Step 1: Students downloaded and learned how to use the FaceBuilder add-on in Blender which allows for the reconstruction of 3D model of a face given images. This is essential keeping in mind the triage nature of the injuries addressed using this technology. That is, previous scans may not be available and accurate reconstruction from past images is needed. See instructional video below. Step 2: Students then hypothesized an injury to the face (e.g., dog bite, removal of cancerous lesion, etc.) and recreated that injury using various sculpting tools in Blender. See image of a few student examples below. Step 3: Students exported Blender models with hypothetical injury as STL files and important the files into Fusion 360. Once in Fusion 360, students. created and extruded surfaces to serve as. customized replacements for regions where injury occurred. These customized surfaces could potentially serve as graft templates, bone reinforcement, etc. See a few images below. Click here for a surfacing tutorial. Step 4: Students 3D printed face (with injury) and associated customized solutions to in the injury. Student circulated and tested compatibility of solution with injury and suggested revisions. Students then presented their simulated process and products to our initial guest speaker for feedback and viability discussion. See a few images of prints below:
|
Categories
All
Archives
March 2024
|
 RSS Feed