|
|
|
Last year a new feature was added to Google Forms which allows users to submit a file (picture, video, document, etc.) when completing a form. Today in class I leveraged this feature to facilitate the curation of a student generated study guide for an upcoming chemistry assessment. Because chemistry assessments usually involve the production of a handwritten graph, diagram or chemical structure, I had students submit a question in text, then upload a written answer using the file upload feature. Click here to see the live form. Below is a screenshot of the form. 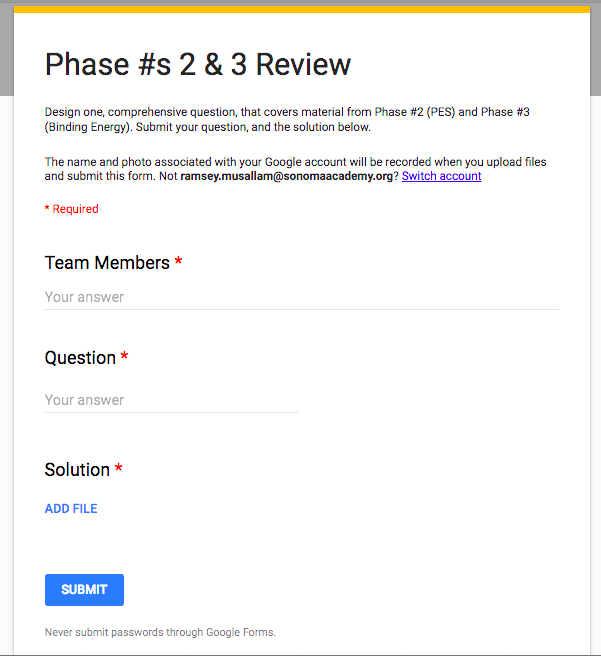 When all groups completed their question and answer an associated, organized spreadsheet was created that, when made available to students, contains a question and link to a clear, handwritten answer from each group. Students used their phones to capture the image, and either accessed the form directly from their phone and uploaded via the photo library, or emailed the image to their computer to be uploaded. Click here to see the live form. Below is a screenshot of the form and a submitted picture. 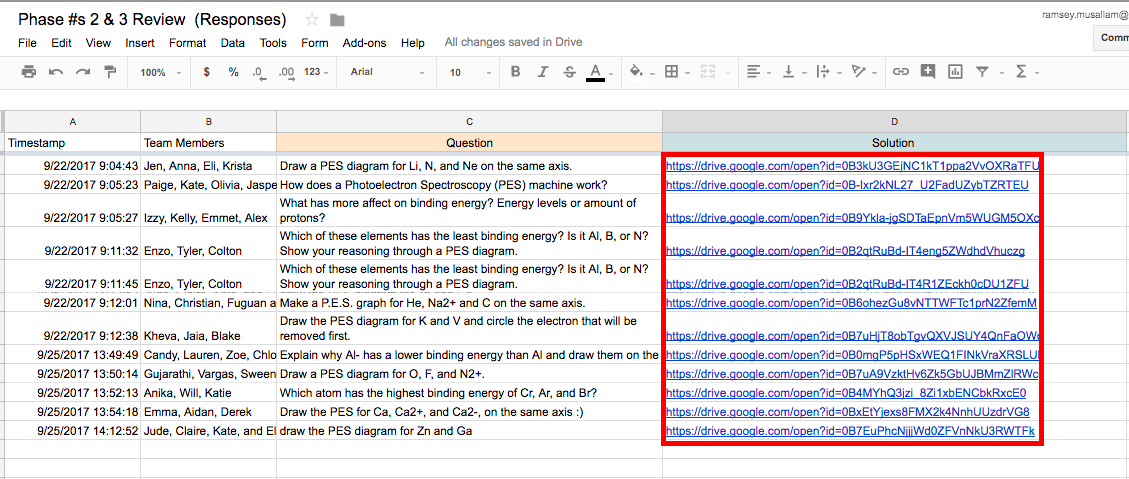 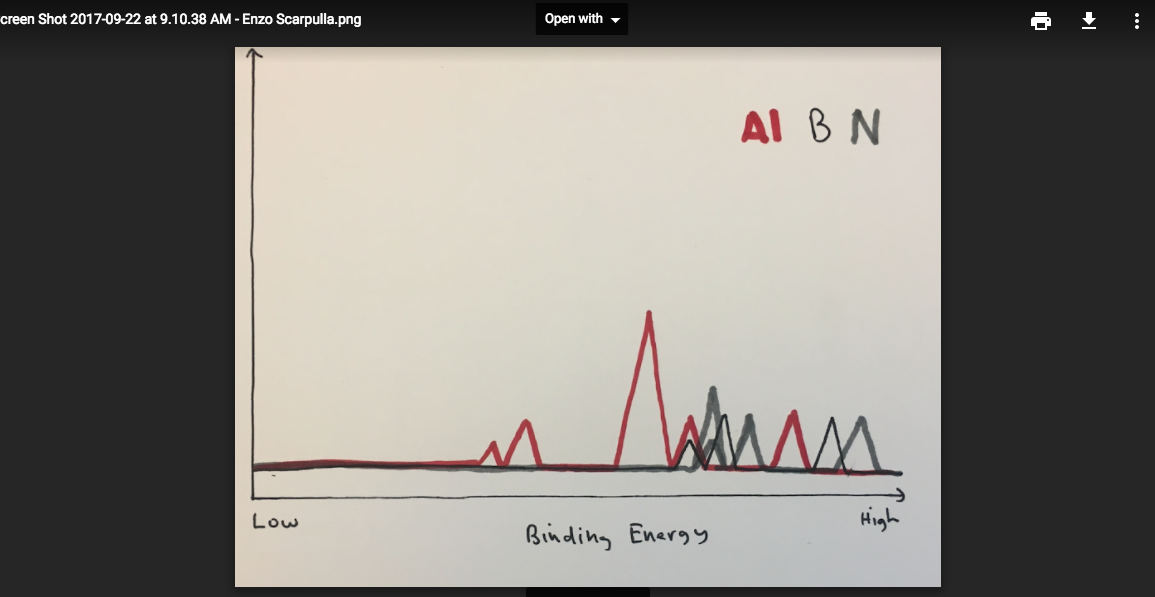 If you are planning on implementing this, or a similar activity, please play close attention to the sharing settings in the folder that collects uploaded documents. 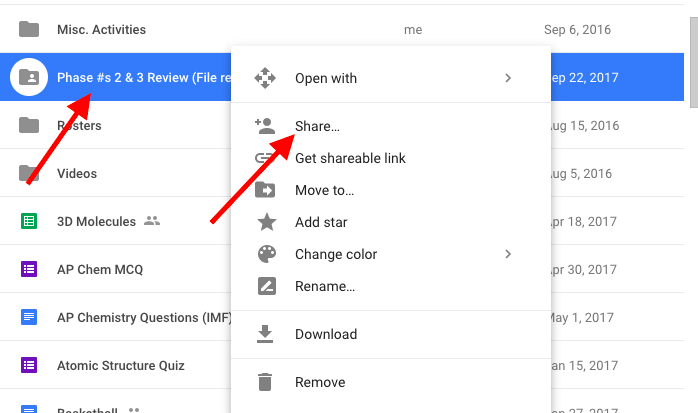 If you do not adjust the settings to "public" in the folder (that is automatically created when you publish a form with a file upload feature) students will not be able to access the links generated that point to this folder. In the case of the activity described, the ability to access the files is necessary for students to view the document. Additionally, the "file upload" feature does not work unless the user submitting the form is part of the same domain.
Last week, in an effort to keep both my sections of Honors Chemistry moving at the same pace, I found myself with a day to spare in one section. With a unit on lab techniques, specifically titration, quickly approaching, my thought was to pre train this section on the specifics of the laboratory procedure.
Simultaneously, a more playful side of me wanted to bust out the MakeyMakeys from summer science camp and give students some time to explore conductivity, and tinker around a bit repurposing everyday materials to build something just for fun. Then it hit me: Why couldn't we do both? Back to titration. Digital Drop Counters used to measure the precise volume titrant added to a flask are nearly $100 with the need for more complex software companions for reading data. This it hit me: Could we recreate a Drop Counter using MakeyMakey (along with the pH probes we already have) to simulate the tools we needed for a successful titration? Yes. Sort of! But super fun. With the help of a few students we devised a simple workflow: First, students wrote a simple program using Scratch that counted clicks when the space bar was pressed. Then, using some fancy graduated cylinder action measured the approximate volume of 1 drop from our Burets, and added a variable to their program that also counted the volume (in mL) of liquid added along with drop number. 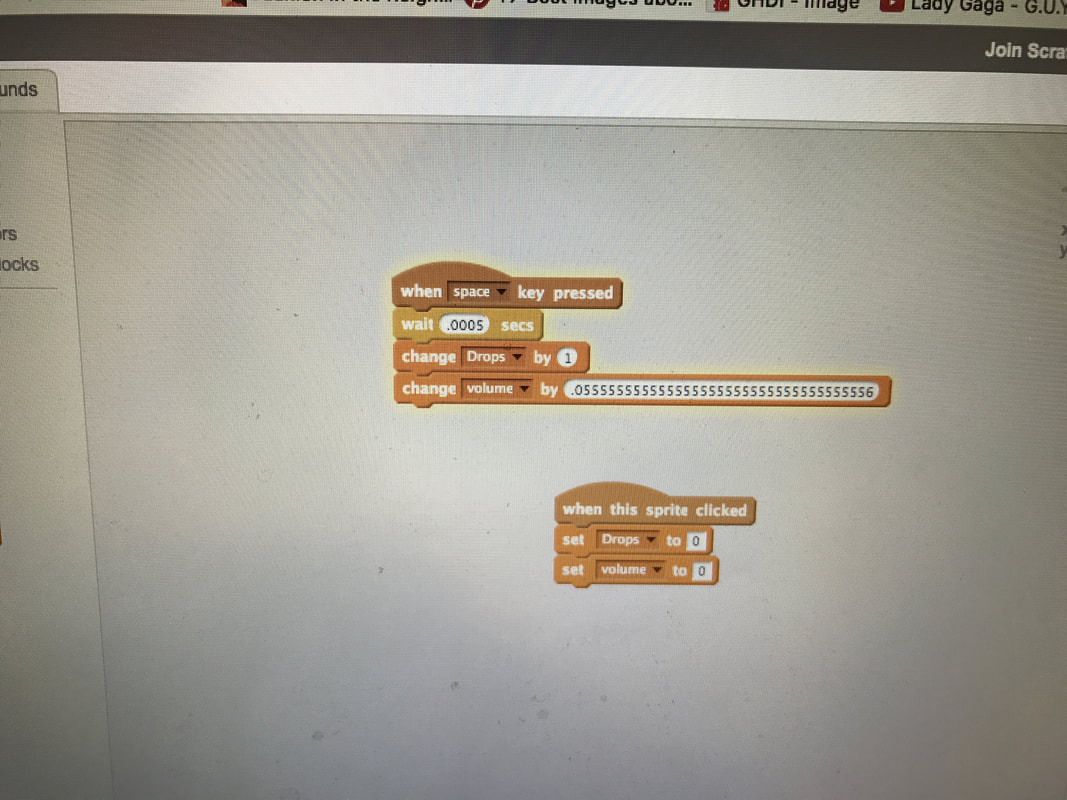
Then for the MakeyMakey! By positioning two wires (one connected to ground and the other to the space button on the MakeyMakey) above the Erlenmyer flask with just enough room for a single drop to complete the circuit, and adding some code to delay the click function for any drops that "stick" to the wires, we were able to accurately measure drops added! Finally something more than a video game controller or banana piano!
Like many teachers, I have always struggled with making assessment meaningful for students. After reading Show Your Work by Austin Kleon I moved from student Google Doc lab reports in chemistry class to blog posts. My goal was for student to build a public archive of curated work that students can feel proud of. For the past few years student blogging has been a success. Click here for an archive of this year's chemistry blogs.
Keeping the above in mind, this is my first year teaching a robotics class in the curriculum and I wanted to institute the same blogging strategy. Unlike chemistry, my robotics class didn't show as much enthusiasm about the blogging process. When I asked one student why his answer was fascinating: "The stuff we make in Robotics class doesn't feel like school. It feels real. Blogging feels like school. They don't really match." Over the past two years, many of these student's teachers have embraced blogging, and while I firmly believe it to be a powerful, public and authentic medium for sharing work, it was clear from the above response, and others I have gathered, that the students yearned for a more authentic, less contrived vehicle to break down the barrier between the "real-world" and school environments. Our answer: Instructables! Whenever I have to learn how to create anything I, and my students, use Instructables. It's just what we do. Because Instructables represents a place where "real" people, go to create "real" things, and is run by a "real" company (Autodesk), whose software we use to create "real" prototypes, it felt like a perfect place to help students, in a Robotics class where building authentic "real" prototypes is core to the class ethos, engage in a type of "real" world product showcasing. Once the decision was made (two weeks ago), I jumped in headfirst, and invited students to use Instructables to post not only share their most recent inventions, but outline their design process. The student's products exceeded my expectations and reminded the power of not only a public product, but also how the power of outlining and unpacking the invention process into steps for others to follow. Instructables provides a fabulous medium where this process happens, not via a teacher created rubric, but via observing the thousands of examples that already exist on their website! Below are three student created examples from my Robotics class at Sonoma Academy.
Years ago I wrote a post about using the webcam "Snapshot" feature to share student work. Click here to read. Nearly four years ago, many tech strategies leveraged in my teaching have come and gone, but that one little hack has never left. The power of sharing written work in a GoogleDoc that I can then comment on is, in my practices as a science teacher, priceless.
Below is an image of a student product: 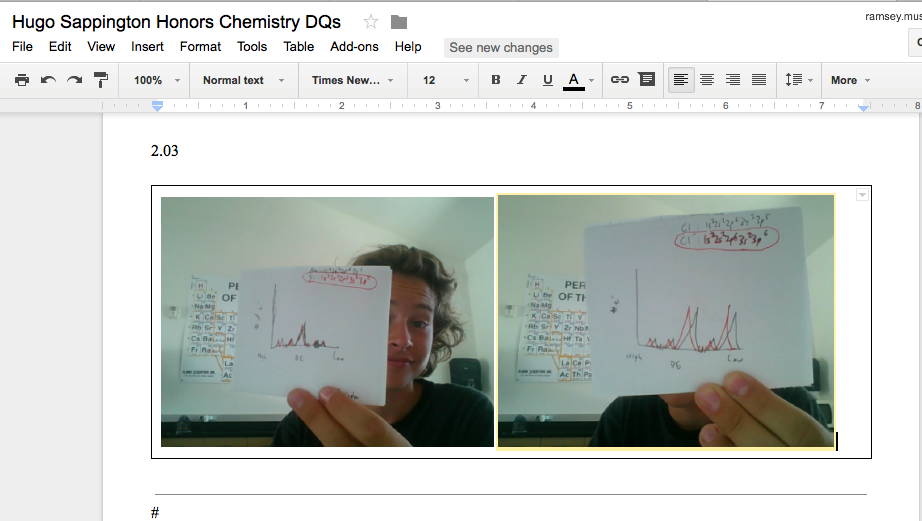
Below is a video that models how to insert an image as a webcam snapshot:
The more I teach, the less technology I use. Don't get me wrong, I love using technology as a strategic partner when designing lessons. However, with each new year in the classroom,, I find myself choosing only few tools but working hard to amplify their impact in creative ways.
Minus Schoology, the LMS leveraged at my school, this year I only (pretty much) used YouTube, GoogleDrive and Blogger. Ironically, I feel this year was the best teaching year I have had to date. Specifically, two "Hacks" if you will, one associated with GoogleDrive, and the other with Blogger, proved to be very successful. Hack #1: Blogger Post via Email This hack allows you to create a blog post by sending an email. Any text, images or video attached to the email becomes embedded in the blog post. The subject of the email becomes the title. The email address you create is a way for YOU to post to YOUR blog and is meant to be private. H O W E V E R, if you share the email address for that blog with your students, you can create a means for all your students to post to one blog via email. A class picture splash page, field trip documentation, white board images and presentations, etc. The options are endless! Below is a screencast tutorial.
Hack #2: Pre-Filled GoogleForm Question
This hack allows you to create a GoogleForm with aspects of the a text box pre-filled to prompt the user. I have been using this feature, which is new to the recently updated GoogleForms, to create response templates to help scaffold AP FRQs, video or reading summaries, substitute assignments, etc. Essentially, anything students are submitting that I, as the teacher, would like to either be very structured or could benefit from a template that could be introduced early then gradually released as students gain fluency. Below is a screencast tutorial. |
Ramsey Musallam is a full-time science teacher in Santa Rosa California.
Categories
All
Archives
March 2024
|


 RSS Feed